Vitordigitizing - Professional Digitizing Service
Luiz Vitor Mendes was born in Blumenau, a city in Southern Brazil founded by a German community.
Vitor started embroidery in 1994, working as an operator in one of the largest embroidery companies in the city.
After a couple of years, he wanted to broaden his knowledge in order to start a business of his own.
Vitor explains: “I already understood how embroidery should work, all that remained to do was to learn how to create it. So, I learned embroidery digitizing just by myself.“

So in 2001, he started working together with a friend, providing embroidery and development services. After just 2 years, he founded his company Vitordigitizing and began to provide his services to clients outside Brazil, and entered the American market. Mainly through social networks, Vitor managed to win new customers and became more and more popular. In 2017, he started his own website to market his services even more professionally.
At a machine fair in the city, he began to investigate in new machines and thus contacted different machine manufacturers. As he states: “From all these manufacturers, ZSK was different. They showed great interest in me although my business was still quite small at that time. I got the best service from them, and they treated me like a family member from the very start and I am proud to be part of the ZSK community”.
What´s special?
Vitor’s designs range from classic embroidery to innovative styles. His expertise comprises complex designs using different techniques such as sequins, beads, laser cutting as well as creations with 3D embroidery.
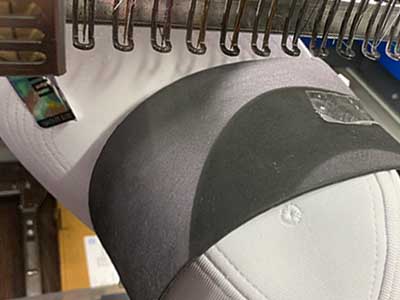
Step by step HAC design
Vitor shows how to create unique cap designs with the ZSK Hot Air Cutter and 3D Puffy Foam.
Step 1
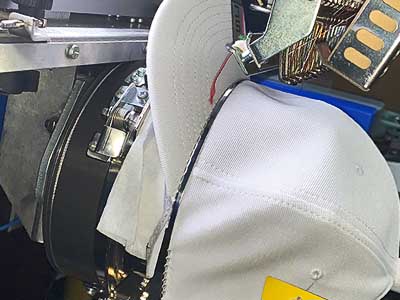
Place the cap in the ZSK cap frame. Make sure it is centred at the middle seam and that there are no wrinkles around the clamp.
Step 2
Lay the material which you want to cut with the HAC device loosely on top of the cap.
Step 3
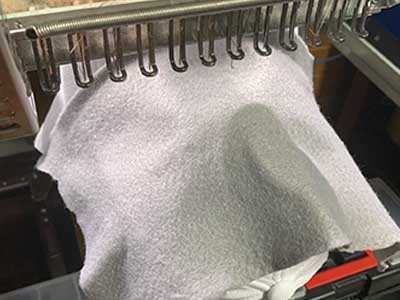
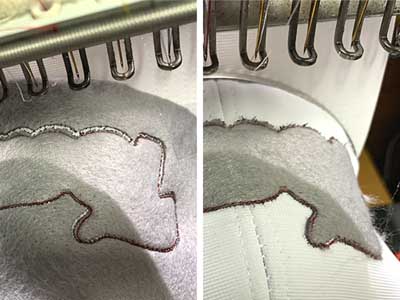
Fix the material onto the cap with a running stitch (app. 2mm stitch length) on any of your needles. Make sure that the line is inside the later cutting line, so that it is not cut away in the next step
Step 4
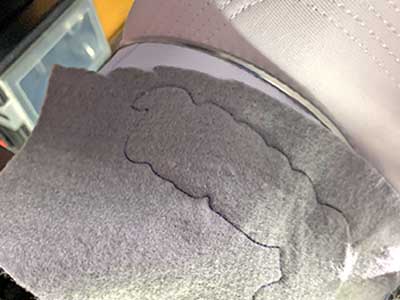
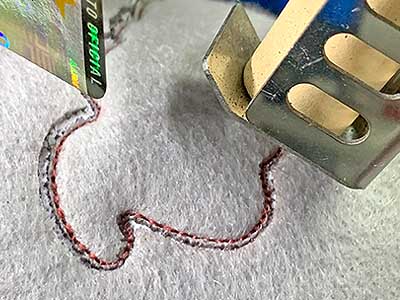
Switch to the needle with HAC device (needle on the far left). It should now be activated. The cutting line is programmed by a running stitch with extremely short stitches (app. 0.5mm).
Please note: Temperature of the HAC device and speed of the machine are key to the quality of the cut. So if you are not happy with your cutting line, check both settings. For example, thicker material tends to need higher temperatures or slower machine speeds.
Step 5
The cutting line should be outside of the fixing running line. Once the complete cutting line is done, the surplus material can simply be pulled off.
Step 6
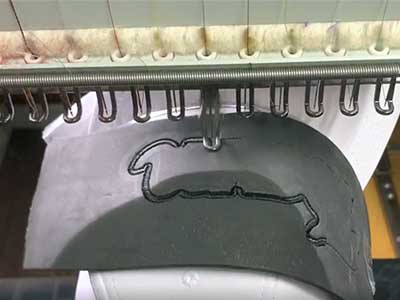
Now place the puffy foam on top. For better grip the edges can be fixed with some cellar tape. However, as soon as the first stiches are placed, the puffy should be already fixed. Lift the pressure foot very high.
Step 7
Now place the stitches on top of the foam.
Use a high density for your design, so that the stitches perforate the foam sufficiently.

Step 8
After the machine stopped, pull off the surplus puffy.

Step 9
Cover the cutting edge with some satin stitch border to give the whole design a clean look.
Contact Info
Vitordigitizing
Telephone: +1 954 889 6764
Email: vitor____________@vitordigitizing.net