Make fixing stitches that avoid loops at the start of objects
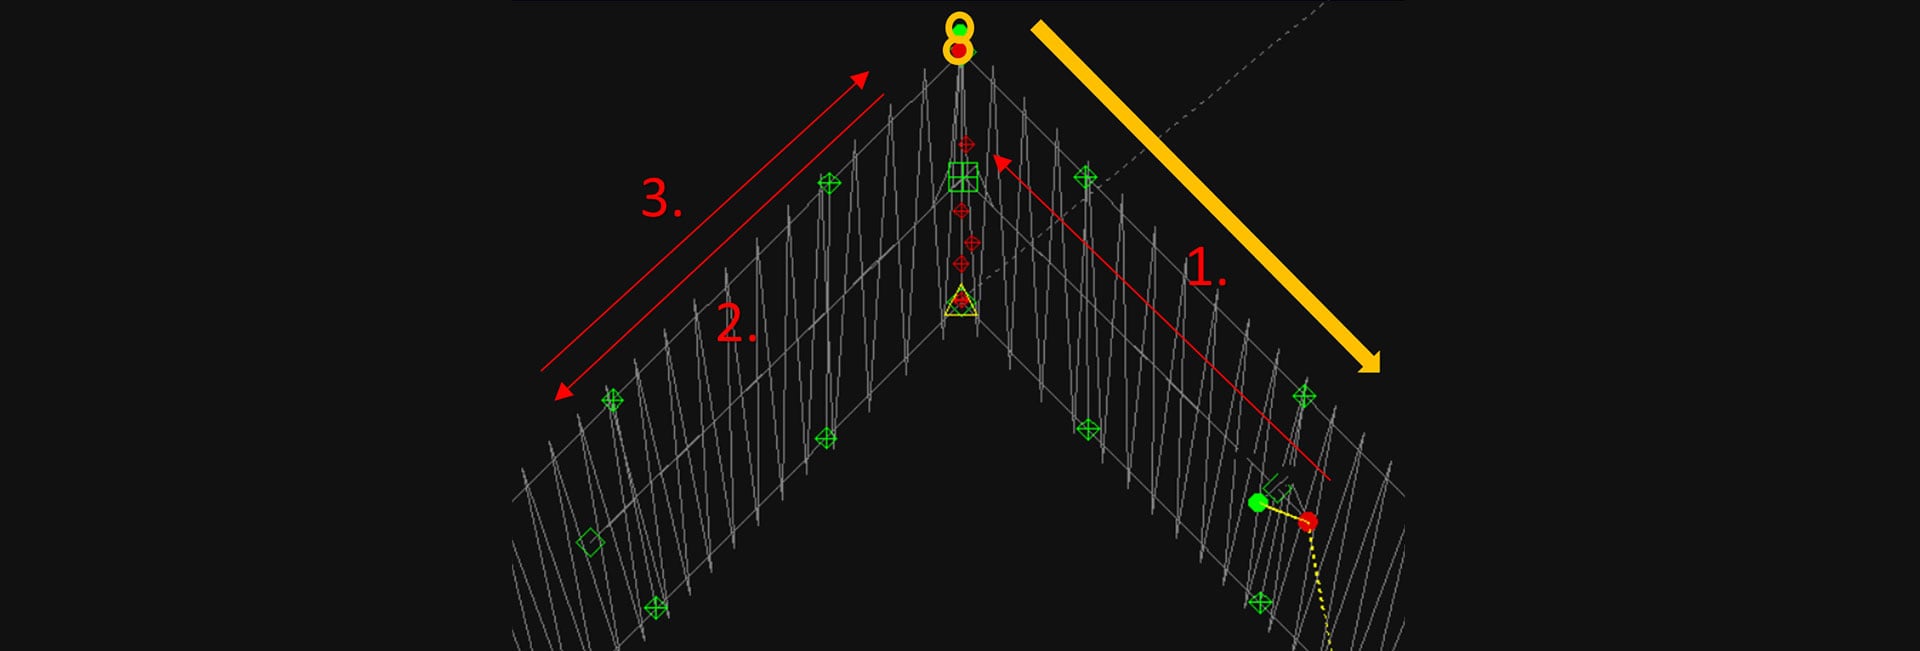
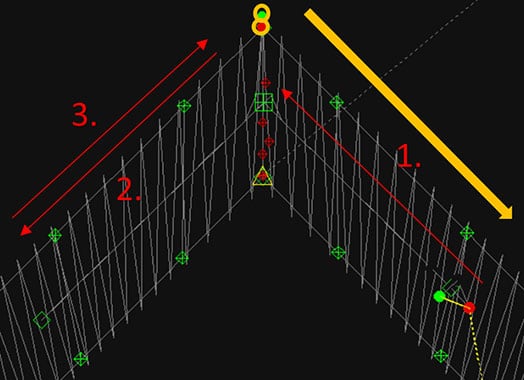
In the following examples, the red dot indicates the very first stitch, the green dot indicates its running direction. The yellow/green dot is the start of the automatic object, when the yellow/red indicates an objects end.
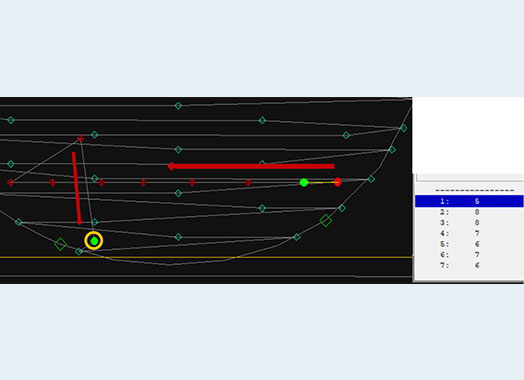
General solution:
- Make around 6 stitches of app. 0.7 mm length from right to left (see the red stitches)
- Make a back stich and another one downwards over the first stitches
If the object is small:
- Try to keep the fixing stitch area in the centre and the stitch length quite small (around 0.4-0.5mm)
- The very first stitches build a small triangle so that the first stitch (where the loop would appear) is covered by the third one going on top The triangle should be followed by a running stich with quite small stitches, depending on the object (here a 2mm wide satin stich has fixing stiches of around 0.4mm)
- The running stiches should go into the start of the object, so that they are immediately covered (satin direction marked in yellow)
If the objects ends in the start (complete shapes)
Especially if the embroidery is done on slippery elastic, or thick material (e.g. a satin stitch onto leather on foam) the first stiches will be pulled out again “on the way back” Here a running stitch with small stitches goes over the whole corner and starts in the middle of the corner, so that a big area is “dragged down”
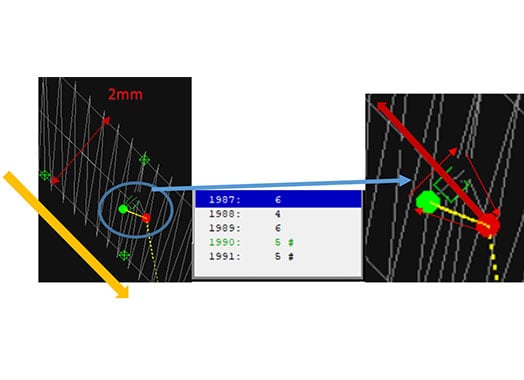
In the following example, a stitching line has been placed over the entire start / end corner, so that the “pressed-down area is big enough and does not yield too much.
This stitch line should end in the start of the object and this should cover the stitching line directly (the yellow arrow indicates the starting direction of the cover stitches).
The following example shows a stepping line, that has been placed over the entire start / end corner, so that the “pressed-down area is big enough and does not yield too much. This stitch line should end at the start of the object and this should cover the stitching line directly (the yellow arrow indicates the starting direction of the cover stitches).
BasePac
Create, edit, manage - our BasePac is the optimal software for your own embroidery files in the field of industrial embroidery...
EPCWin
The creation of embroidery design data for the different embroidery processes is still one of the biggest challenges...

Carl - The customer magazine
In our customer magazine we are publishing updates about ZSK STICKMASCHINEN, our embroidery machines and accessories.